Minimalist Work From Home Desk Setup for a Software Engineer
Please note that some of the links below are affiliate links and I will earn a commission if you purchase through those links. I use all of the products listed below and recommend them because they are companies that I have found helpful and trustworthy. Please let me know if you have any questions about anything listed below! david@thedaveman.com
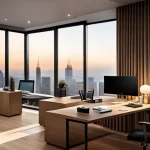
My all-black, minimalist, work from home desk setup, is my preferred and favorite desk configuration as a software engineer. I have owned several desks over the years, but I have finally found the setup that I love.
As a software engineer and a web developer, the way I set up my desk is one of the most important planning decisions I need to make because my desk is where I make my living and how it is set up defines my productivity, efficiency, and ability to work effectively.
This post provides a list of all the items I include in my desk setup, with my reasons why I chose the particular item, my review of how well it works, and my recommendation for purchase if you should decide to incorporate it into your own personal desktop setup.
I’m also including links to the individual products for your convenience. You’ll find all of them budget friendly and reliable compared to similar products on the market.
The reason I did this is because purchasing each piece separately was less expensive, and I was able to customize my desk more appropriately, to suit my needs.
My desktop is a black tabletop that is highly resistant to spills and oil stains. Additionally, it does not reflect much light, making it ideal for working in the dark or low light and helps to reduce strain on my eyes when I work long hours.
The desk comes with 3 holes, pre-drilled, allowing me to run cords through the desk from both sides and the middle section of the desk.
The desktop comes in 3 sections and measures 32×63 inches with a curve cut into the front of the desktop creating a wrap-around effect that makes it easier from me to rest my arms on the desktop, while also allowing me to turn my chair to each of the 3 monitors on my desk while having the same amount of desk space in front of me, on each section.
The desktop is sturdy and whatever material it is made from, makes it resistant to scratching and water stains as I mentioned above. I’ve left water glasses on the desktop accidently and it doesn’t leave the typical water ring afterward.
The holes to connect it to the base are pre-drilled making assembly easy and efficient.
Standing Desk Base with Dual Motors
The standing desk with the dual motors is of excellent quality. You can create 3 height memory positions, using the associated buttons, and you can also adjust heights using the up/down arrows if you need a height different from the memorized positions you initially set.
The desk can lift up to 350 lbs. smoothly.
I filmed the lifting of the desk with full glasses of water without even making a ripple in the water. It can lift my entire setup without any issues or problems.
[show video or gif of water glass on desk showing water not rippling while being raised or lowered]
I am 6 feet tall and with the desk raised to its full height, I can stand up straight to work, and there is enough desk space to rest my full weight on my arms on the desk while still typing comfortably on my laptop
Optional Locking Casters
Another great feature is the option to include locking wheels for the desk allowing me to move the desk to different locations around the house.
I can simply unplug one cord, unlock the wheels, and move it wherever I like.
Despite having the wheels, the desk is incredibly stable even when extended to its full height, lthough, I would recommend lowering the desk before making any drastic moves, especially if you are moving it on carpet.
It would be a shame to have the desk topple with all your electronic gear, or even worse, with a drink sitting on top.
Executive Office Chair
My executive office chair is one of the more expensive items included in my desk setup. I consider my chair to be an investment in my own health. During the pandemic, I was sitting so much that I wore out 3 chairs!
Additionally, I started to have back, and hip problems (leading to an eventual hip replacement!) and I realized I needed an ergonomic chair with plenty of padding for both my butt and back.
I chose this chair and have no regrets, though I wish it was more adjustable. It is made for big men and can hold up to 400 lbs.
It has lasted 3 years so far, with normal small signs of wear and tear, while the padding is still comfortable. I spend upwards of 8 hours per day in this chair, working, and it still supports my weight well.
The only downside to this chair is the fact that it cannot lock into position leaning back, and even in the lowest position, it still sits a little high for me, putting pressure on the undersides of my legs, requiring the use of a footrest.
Footrest
I use a basic ergonomic adjustable footrest the can rock forwards and backwards. It alleviates the pressure of the chair from the bottom of my legs and helps me maintain a more ergonomic position of 90 degrees.
It also allows me to rest my feet flat or in some cases to stretch out my Achilles when I’m sitting for long periods of time.
I can move it around when I switch between viewable monitors, and it is durable enough to support most of my weight when I switch positions.
When I’m standing at my desk, I can rest one of my feet and do some minor stretching of my calves and Achille’s heal.
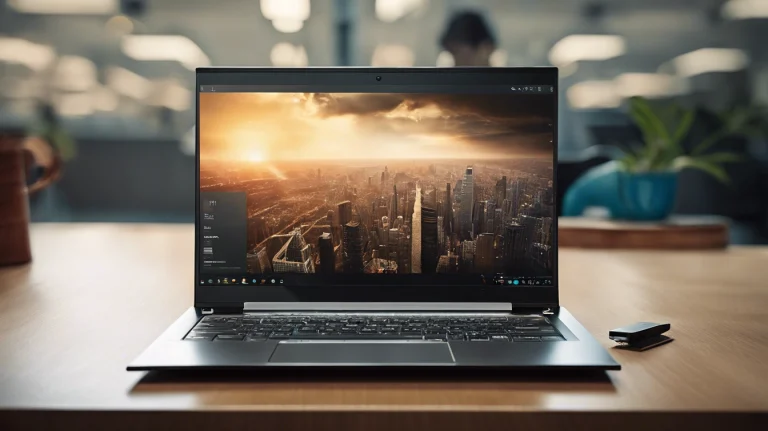
Lenovo Carbon X1 Gen 6
This laptop is one of my favorite computers of all time. The Lenovo X1 Carbon Gen 6 is durable, reliable, fast, and utilitarian. It has every feature you need to work remotely but can easily be used as your main computer on your desk.
I have had this computer since 2019 and I bought it used, while I was attending Full Stack Coding Bootcamp at UCLA.
My old gaming computer stopped working and I needed a reliable computer to finish a project I had due at the end of that week.
I had already done some research and one of my main considerations for purchase, was the ability to customize it to some extent, but more importantly, to have something lightweight enough to carry in my backpack that wouldn’t hurt my back if I had to carry it for long periods of time.
I did, in fact, customize the computer, replacing the 500 gb hard drive, with a 2 tb Samsung Solid State hard drive, giving me faster speeds and 4x storage space. This computer is a workhorse and can do everything I ask of it,
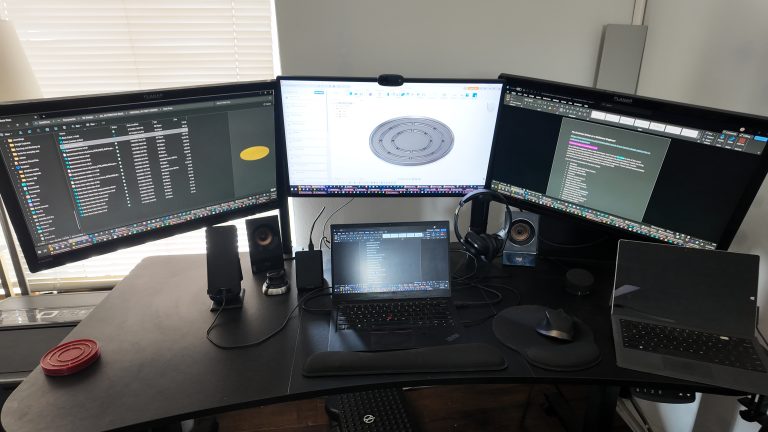
I use 3, cheap, Planar 27-inch Monitors for my desk setup. Each monitor is 27 inches giving me almost 7ft of working screen space. It is an incredible work-from-home desk setup for productivity because I can also use my laptop screen as a fourth monitor, and I can move windows across screens to suit my needs.
This is incredibly important working in software or web design because it eliminates the need for me to constantly switch back and forth between screens, wasting time and subsequently, working less efficiently.
If, or when, one of these monitors stops working, I can easily replace it without breaking the bank to do so. I have been using these same monitors for over 12 years and I use them for music production, animation, software development, 3d CAD, video editing, and movie and video entertainment.
The colors may not be top of the line, but they suffice in most situations.
Dual Monitor Arm Mount
This may seem confusing at first, but the Dual Monitor Arm Mount was half the solution I found to hold my monitors while allowing the middle of my desk to stay empty and somewhat cord-free, allowing me to place a surge protector in the middle of my desk without being impeded by my monitor arms.
The arm mount clamps to the desk and can easily hold 2 monitors allowing me to hold them at eye level, leaving me free to rotate them slightly to face me directly.
They are cheap and inexpensive at less than $120 at the time of writing this article, and hold the standard mounting screws for most monitors.
They have a black anodized metal that prevents rust and resists dust accumulation, making them easy to clean. Additionally, I wrap cords around the poles to make the desk appear wireless.
Single Arm Monitor Mount
The single arm monitor mount is the second half of my monitor setup. It holds only one monitor, but it holds it to the far side of my desk, allowing space for the 2 other monitors to take up the middle and right side of my desk. Other than holding one monitor, it is identical in feature to the dual monitor mount described above.
Logitech Desk Speakers
I prefer Logitech for many of the products on my desk. The quality of their products is consistent and reliable. The sound the Logitech speakers produce is comparable to many high-end speakers and monitors. It lets me enjoy sound in high definition.
These speakers are small enough to fit on my desk with the included subwoofer placed behind one of my monitors on my desk.
The volume control is a little awkward to use being that the bottom of the control turns to adjust volume rather than the top knob, the expected part to turn on most devices. It works fine and has an additional headphone jack embedded in the upper knob. I plug this into my laptop when I’m working from home.
I mounted this underneath the desk to supply power to all my desktop devices, and it makes it so the entire desk only needs one plug to disconnect before moving the desk to another location in my house.
I 3d designed and printed the pieces to secure the surge protector to the bottom of my desk.
You can download them here
Space mouse for 3D Design
If you are planning on designing products, toys, or inventions using CAD software, then it is imperative to have a 3d Connexion Space Mouse. This little mouse is perfect for navigating in 3 dimensions.
You can pull this mouse up and down to zoom in or out. If you lean the mouse right, left, forward or backward, you can rotate around the object you are designing. If you twist the mouse, you can rotate around the object in a circle.
It uses a micro-usb cable to recharge the mouse
You use this mouse with your left hand while using your right hand and mouse to navigate around the environment. The only thing this mouse is lacking would be shortcut keys or buttons, that you can get using the premium version of the Space Mouse.
It is slightly expensive at $199, but worth the money and indispensable for doing CAD work.
Logitech Mx Master 2s
The Logitech Mx Master 2s is my favorite mouse to use, hands-down. It has the best ergonomic grip, the smoothest middle wheel roll, the lightest left mouse clicks and it charges using micro-USB, meaning you never have to change batteries.
This mouse can also work on 3 separate devices, even at the same time.
If you use the Logitech App that comes with the mouse, it can be configured to copy paste from one device to another. You can add a tablet as a separate device and move information from one device to another directly without wires or a Bluetooth connection!
There are so many other buttons on the mouse that you can customize to make it more convenient and efficient for your workflow. [images of the different buttons on the mouse]
It’s great to have both a back and forward button when browsing on the web. It also has a secret thumb button that can bring up all your windows at once, making it easier to switch between applications and windows quickly.
I have 2 of these devices. One I keep on my desk and another I keep in my backpack
Logitech Web Camera
Although I have an embedded camera on my laptop, I prefer to use a Logitech Web Cam because of the higher-quality camera, included microphone, and its ability to quickly install to my laptop and provide a high-definition video and audio, with better clarity than my embedded camera on the laptop.
It comes in a very small profile and looks unobtrusive clipped on top of my middle monitor. I can place it anywhere using the included clip attached to the camera. Sometimes I use it as an overhead camera to take down-facing video such as recording my keyboard or demonstrating a specific product I want to advertise.
It is also useful if you are disabled and unable to type. I use it periodically for dictating text directly onto my computer. It can pick up my speech and type it to the screen with about 98% accuracy or better.
Phone stand with card Reader
I originally purchased this phone stand and card reader to hold my phone next to my computer while also having the advantage of both a card reader and an additional USB C port.
It takes up a very small amount of space on my desk and worked very well and provided convenience for setting my phone down quickly.
It did, however, have one disadvantage. I couldn’t stand up the phone in portrait mode, facing straight up and down, while the charging cord was connected. (Definitely a good reason to purchase a phone with wireless charging).
I was able to charge the phone while it was laying down sideways, in landscape mode, but most times I really needed it in portrait mode.
I did end up designing and printing my own 3d phone stand that allowed me to hold the phone higher off the table and allows me to charge the phone in any position.
I decided to keep this stand, anyway, for the card readers and the extra USB ports.
I set one of my external hard drives on the device instead. This helps me keep some of the cords off my desk and looks pretty cool as well
3d Printed Phone stand
If necessity is the mother of invention, well this item is the product of that. I researched and tried to find the perfect phone stand for my desk and after years of searching, I decided to design one for myself.
The requirements:
Needed to be sturdy enough to hold the phone without shaking.
Charging cord needed to sit in its natural position while the phone rested in any position
The cord needed to be able to move freely without needing to use 2 hands to manipulate it.
It had to be capable of being printed in one piece without supports
Last, I wanted to be able to fold it up to take with me in my backpack
Out of the 5 requirements I listed above, I was able to complete 4 out of 5 so far.
I haven’t quite figured out how to make it fold successfully, yet. I am going to continue to evolve the prototype over time and will perhaps manufacture it in another material such as titanium or carbon fiber.
I purchased an extra turbo charger for my phone, separate from the one included with my phone purchase. This way I could keep one on my desk and one in my backpack. This purchase is a no-brainer for the convenience it provides. I can sit my phone down on the desk and have my phone completely charged in 30 minutes or less.
I use it to charge other items on my desk as well including my headphones
Phone charger micro-usb
I have a phone charger that supports Micro-USB, from a previous phone that I purchased. I use it now to charge other devices on my desk including my Logitech Mouse, my Vape pen and a variety of small devices that I use sporadically.
I like to be able to charge items quickly without having to search for cords or available sockets to plug into. This satisfies that problem and helps me stay productive and efficient.
65-watt AC charger for Lenovo Carbon
I mention the AC Charger for my Lenovo Gen laptop because I purchased a second one to keep in my backpack. This way I can keep one on my desk permanently and another in my backpack. It makes it easy to set my computer down, plug in, and get back to work.
This clamp on desk hook is intended to be used as a headphone hanger, but since I already have a 3d printed headphone stand on my desk, I instead use it as a backpack hanger.
It is made of metal so it is quite sturdy and can hold the entire weight of my backpack without bending or breaking.
I originally used it before the pandemic, when I was still going into the office every day. I would leave it in the office clamped to my personal desk. Since then, I realized it is a perfect tool to store my backpack while still having easy access to it.
I can load and unload it directly from the hanging position, enabling me to keep my more portable items inside the backpack for easy use and mobility.
The hook clamps onto any part of the desktop and stays out of the way, even when raising or lowering the desk. It folds into a slim profile when the backpack isn’t hanging from it and if I ever do go back into the office, I can pack it along with my other items easily.
This printer is not the smallest but, for the price, includes most of the functions that I require, such as wireless access, bed scanning, feed scanning, faxing, and of course printing.
The best feature of this printer is both the mobile app and the included desktop client, Brother Iprint&Scan. The desktop client allows me to set up one-touch workflows. A great efficiency tool for quick scanning directly into my folders on my computer and the cloud.
Check out the images below to see how it works.
Brother Iprint & Scan One-Touch Workflows for Scanning
WorkFlow 1
Workflow 2
Workflow 3
Workflow 4
Workflow 6
Workflow 7
What this means is that I can set up locations on my computer, specifically my cloud account, where I want scanned documents to be saved.
I only have to set up these locations once and from that point, I just set the paper on the scanner, hit the one-touch workflow, and then the documents are filed in their appropriate with a name and date timestamp for easy indexing.
I can access all of these files from my mobile phone, as well, using my cloud account. Additionally, I can use my phone to take pictures of these files and save them to the same location, if I don’t have access to my printer for some reason.
I try not to use any pens nor do I use paper unless there is something imperative I absolutely need to print.
This is the exact routine I use for processing snail mail and other important documents so that I can get rid of paper as soon as I get it.
You can also order ink inexpensively, through either the app, or the desktop client, making this one of the most important items in my desktop and office setup.
It doesn’t, however, sit on my desktop. Instead, I keep in on top of my 3 drawer rolling file cabinet so that it can be moved easily around my office if or when the need arises.
3-drawer under desk file cabinet
This small 3-drawer file cabinet was used to replace my old 5 drawer file cabinet once I chose to go completely paperless. I use it to store stationery, office supplies, and writing instruments, along with paperwork that I am required to store in physical form such as leases, contracts, tax returns, personal documents, etc.
It is small enough to sit underneath my desk but I usually keep it off to the side so that I have more leg room. Additionally, I keep my printer on top of it, making it easier to scan and print without having to move it or raise my desk.
The top two drawers are used for office supplies and the bottom drawer is used for files. The entire drawer can be secured with the included lock, making it a semi-secure place to keep confidential files.
It has wheels on the bottom that roll smoothly so if I need to move it to a different part of the house, that task is easier and more convenient.
There is an additional 5th wheel on the bottom in the front of the bottom drawer that allows you to fully open the drawer without it tipping over due to excessive weight inside the cabinet.
Web cam boom scissor arm
The web cam boom scissor arm comes in handy for when I’m filming videos or using a microphone. It has the screw for connecting to the bottom of most cameras and can be used to hold a full-sized microphone as well.
I don’t keep this on my desk all the time because it takes up space and is generally an eyesore, but it is easy to set up when I need it and can be attached easily using the included clamp.
It can turn 360 degrees and folds into a small 1ft x 3inch x 1inch profile when it is not in use or stored in my office supply cabinet.
3d printed drink coasters
I needed some drink coasters for my desk, and I wanted to design them myself. The requirements were that they could not leak fluid onto the desktop, and they had to be able to hold hot drinks and be stackable when not in use.
These took me about 30 minutes to design and they have been on my desk for 2 years now. When they get dirty, I can wash them in the sink using soap and water like any common dish and they are large enough to hold bowls or large glasses as well.
If you are interested in purchasing the file or the actual coasters, you can order them here.
3d printed Headphone stand
I didn’t design this headphone stand. I downloaded this from Printables. I had recently purchased headphones for my desk and wanted a quick solution to hang them.
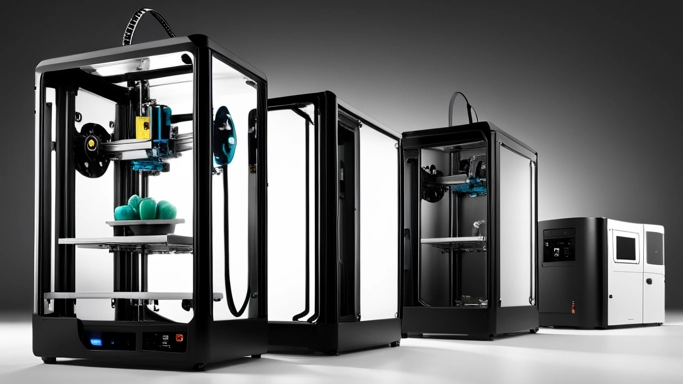
The design took about 3 hours to print on my Bambu Lab A1 Mini and has been sitting on my desk ever since. I intend to design my own stand soon and will post the design once it is complete.
3d printed cable organizers
These were simple cable organizers I designed and printed to help organize the cables and surge protector running behind and underneath my desk. They took about 20 minutes to design and less than an hour to print.
I love this desk set up for my home. Despite the number of items listed here, the set up is relatively minimalistic, easy to clean, and unclutters my desk space, and by proximity, my brain, enabling me to focus on my work, and stay efficient and productive.
The black desktop helps to alleviate eye strain associated with long periods of screen time.
The entire set up is easy to take down and move, and the entire setup is inexpensive, relative to some of the desk set ups I see online as well as in the office from my co-workers.
Admittedly, I could probably do more to eliminate the cords, but I don’t want to spend more time obsessing on how the desk looks vs how well it functions.
If you are interested in other aspects of my lifestyle as a software engineer and web developer, you can check out some of my other articles